Raspberry Pi : Setting up (Part III)
Hello Guys Today will Setup Raspberry Pi:
Before this we will go through prior setting up Pi and configuring it
Hook Up Your Raspberry Pi
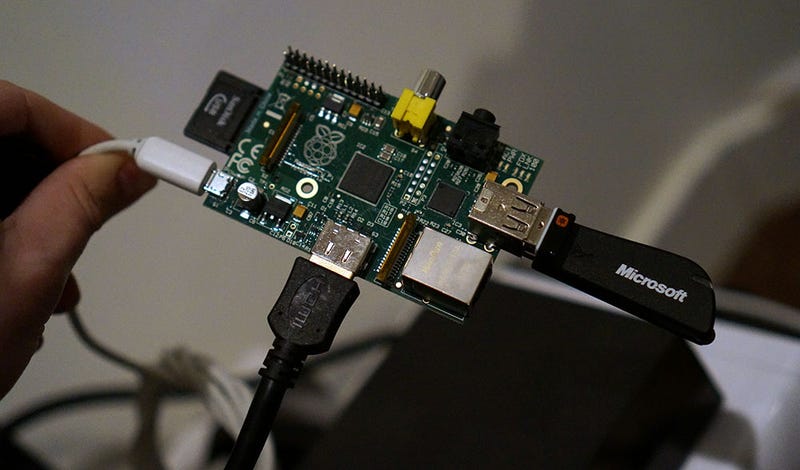
Connecting everything to your Raspberry Pi is pretty easy. Start by connecting the HDMI cable from the unit to your television (or monitor). If you’re using the analog composite video connection instead, connect it to your television (or monitor) and plug in a set of speakers to the 3.5mm audio jack. If you want your Raspberry Pi to connect to your network and/or the internet, use an Ethernet cable to connect it to your router. If you’ve set up a computer before, this should all seem familiar.
Finally, you need to connect your Raspberry Pi with a micro USB power adapter. As mentioned earlier, you need an adapter that can provide at least 700mA at 5V. Fortunately, you probably already have one. Many smartphone and tablet chargers utilize micro USB and provide 700mA at 5V (or more). You can find out by reading the small text on the plug and looking for the output section. (Note: it may say 0.7A (or higher) instead of 700mA.) When you have a compatible power adapter on hand, connect it to a micro USB cable and then connect that cable to the micro USB port on your Raspberry Pi unit. It’ll turn on all by itself and you should see it boot for the first time.
Configure Your Raspberry Pi

Once your Raspberry Pi boots for the first time you’ll need to configure a few things. You’ll know it’s ready for you when you see a Raspi-config window with a pretty big list of settings. You can mess with the others if you feel so inclined, but the only thing you really need to do is expand the file system so you can use up all the space on your SD card. To do so, follow these steps:
- Select expand_rootfs (the second option) and press enter.
- Confirm that you want to expand the file system and let Raspbian do its thing.
- When you’re returned to the configuration list, go all the way to the bottom and select the Finish option.
- It’ll ask you if you want to reboot. Choose yes.
Your Raspberry Pi will reboot and take a little longer this time because it needs to expand the file system. After a about a minute you’ll be asked to log in. You’ll need to use the default username and password:
Username: pi
Password: raspberry
Once you’ve logged in, you’ve got yourself a working Raspberry Pi. Congratulations!
For more go through the video:
https://vimeo.com/91631396